Evenflo Car Seat Installation
Evenflo car seat installation is very simple and straightforward. In this article, I shall be guiding you step by step on installing your Evenflo car seat with instructions from the manual for the different types of car seats – infant car seat, convertible car seat, all-in-one and booster seats.
However, you can find Evenflo car seat manuals for all models on this page, Evenflo car seat expiration.
You can also find installation guides for other car seat brands here;
As detailed as this Evenflo car seat installation guide may be, you’re still encouraged to access the car seat manufacturer’s guide for proper installation through the car seat manual suitable to the model you have.
Basic Instructions Before Beginning Evenflo Car Seat Installation
- You should register your new car seat either by sending your details to the manufacturer’s address or online at https://registration.evenflo.com/evenflo/us/carseats
- Study your vehicle owner’s manual to know the recommended seating location to install your car seat. Never install an infant car seat in rear-facing in the front passenger seat. The center-rear location is the safest spot for a car seat.
- Ensure to follow the age, weight and height requirements for a car seat model according to the manual.
- Do not use the tether strap when the car seat is installed in rear-facing.
- A child must be at least 2 years old to use a car seat in forward-facing.
- Do not use the highest harness slot in rear-facing.
- Do not use the lowest harness slot in forward-facing.
- Do not use both the LATCH/LUAS/ISOFIX system and the vehicle seat belt at the same time.
- Do not attach two or more lower anchor connectors to the same anchor bar.
- For additional resources or to check your installed car seat, or for help installing your car seat, you can visit the following recommended websites:
nhtsa.gov • www.seatcheck.org • www.safekids.org
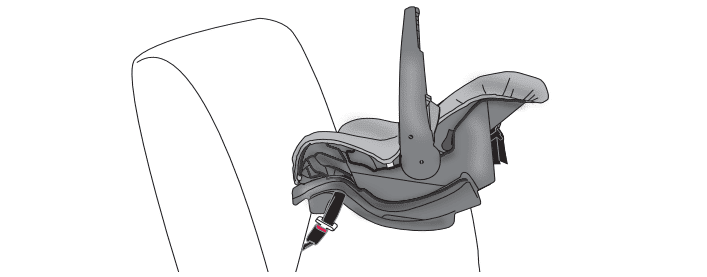
Evenflo Infant Car Seat Installation
Evenflo infant car seats include the Nurture Infant car seat and NurtureMax infant car seat, amongst others.
Depending on the model you may have, the installation process is similar. However, you should still check with your model’s manual for clarification.
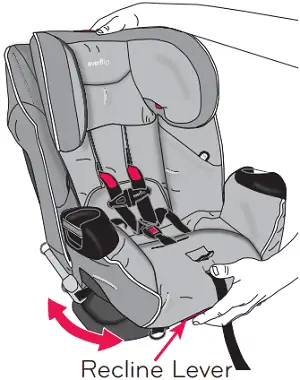
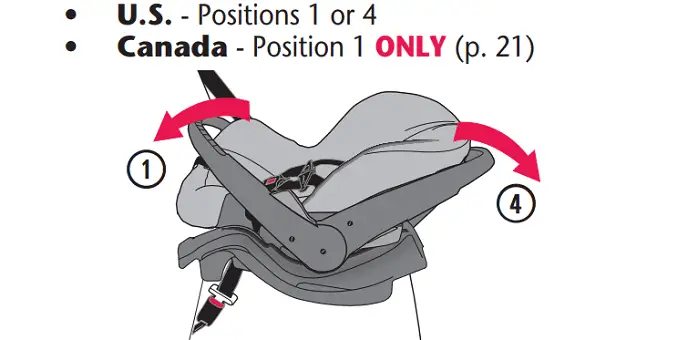
How to Adjust the Recline Position
Some Evenflo car seats can be adjusted into three positions depending on the car seat model.
To adjust the recline position, follow the following steps;
- squeeze the recline lever at the bottom of the car seat and select the desired recline position.
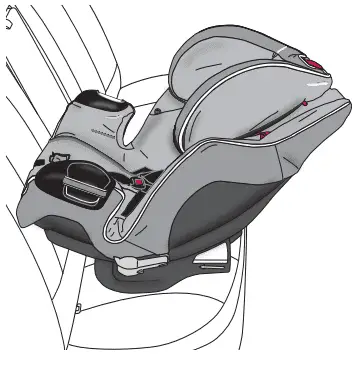
Evenflo Car Seat Installation with Base Rear-facing
How to Install Evenflo Car Seat Base Using LATCH
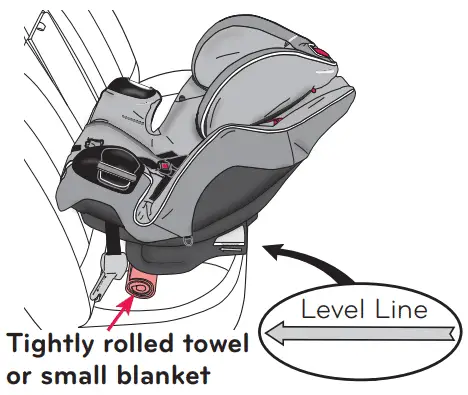
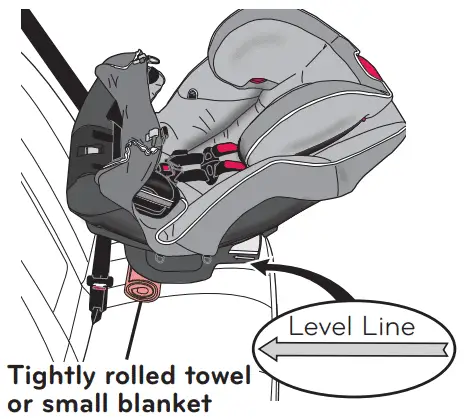
- Ensure your vehicle is parked on a leveled surface.
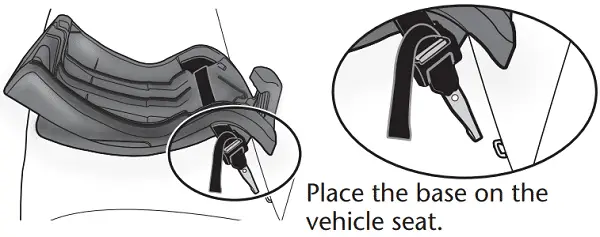
- Place the base on the vehicle seat in rear-facing.
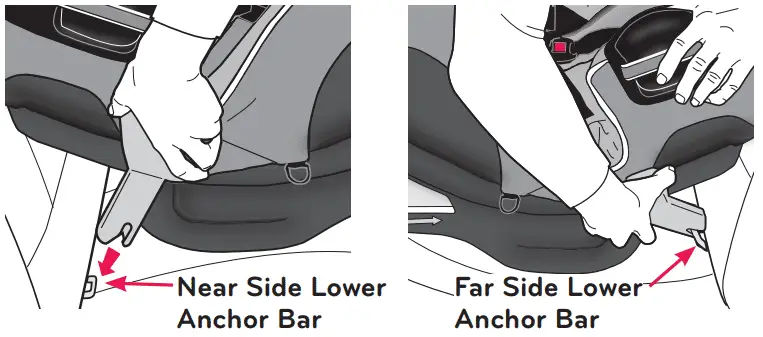
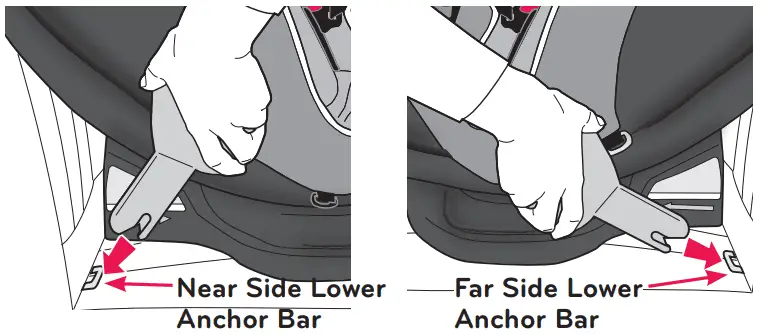
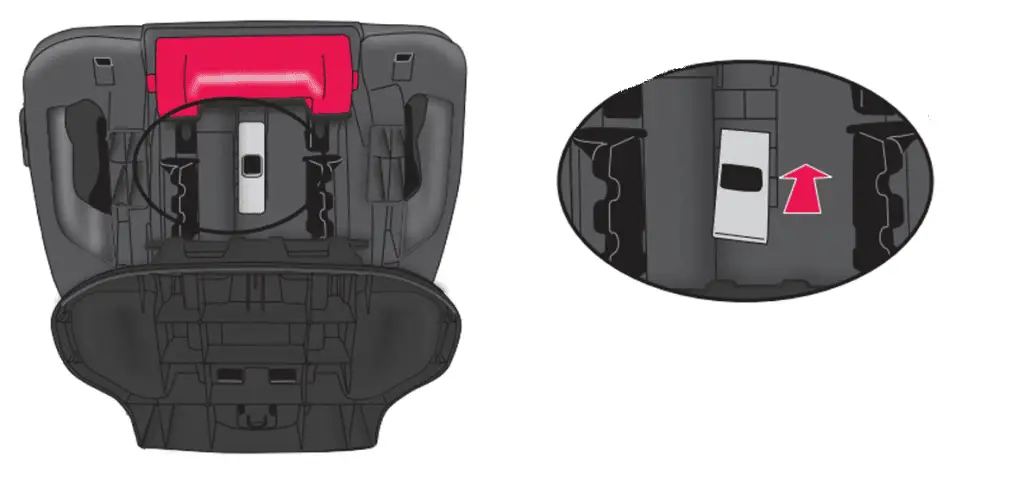
- Pass the lower anchor strap through the belt path and hook the strap to the lower anchor bar as shown;
How to Install Evenflo Car Seat Base Using Vehicle Seat Belt
- Steps 1-2 above
- Pass the vehicle seat belt through the belt path and buckle.
Video Guide: Evenflo Car Seat Base Installation – using Seat Belt
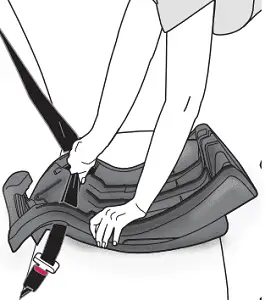
How to Attach Evenflo Infant Seat to the Base
- Place the front of the infant seat under the hook and snap the seat into the base.
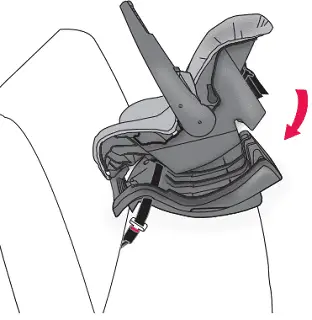

How to Remove Evenflo Car Seat from Base
- Move the carrying handle to position 2 by squeezing on the handle releases and rotating the handle until it locks above the carrier.

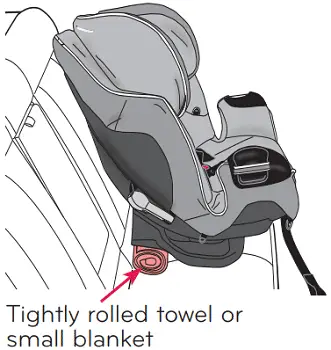
Evenflo Car Seat Installation Rear Facing Without Base
Safe Use Checklist / Basic Instruction When Installing Rear-Facing
- Ensure the car seat is secured to the vehicle seat.
- Secure your child in the car seat. The top of the head should be at least 1 inch below the top of the infant seatback.
- Fasten the buckle.
- Make any necessary adjustments like the crotch strap and the harness straps.
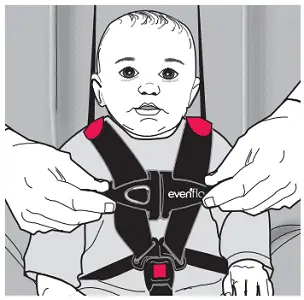
- Ensure the chest clip is positioned at the armpit level.
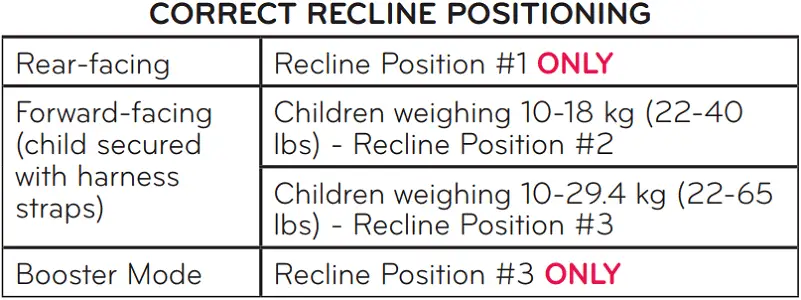
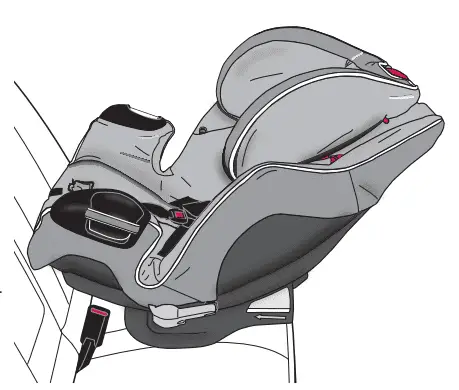
- Ensure the child restraint is installed in Recline Position #1.
- NEVER use Recline Position #2 or #3 for rear-facing.
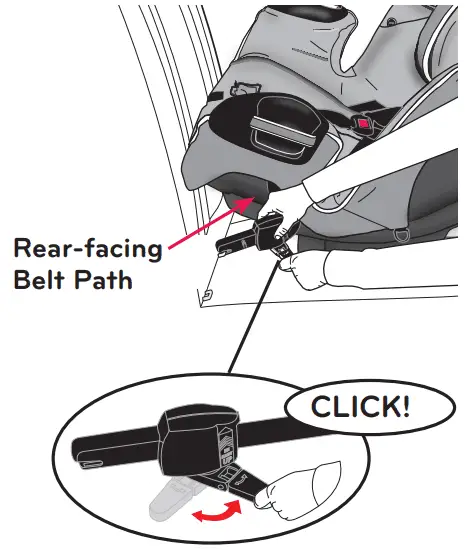
How to Install Evenflo Car Seat Using LATCH/LUAS/ISOFIX in Rear-Facing
- When using LATCH, do not use the vehicle seat belt.
- Adjust the recline position to #1.
- Place the car seat in the vehicle back seat in a rear-facing position.

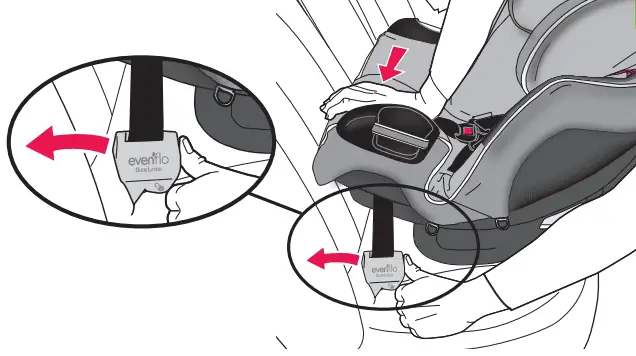
Securing With SureLatch
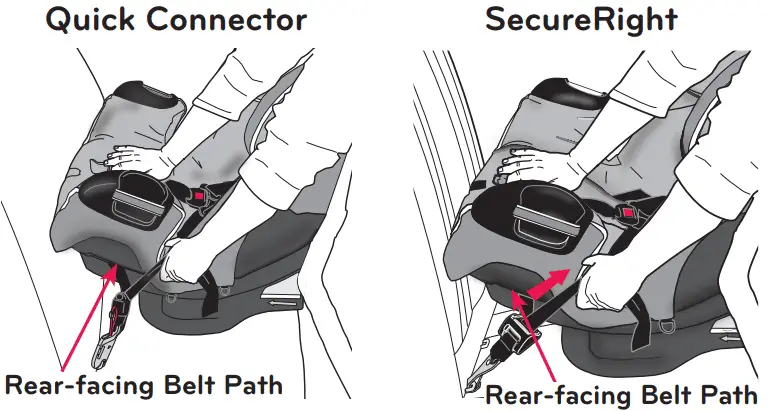
Securing With QuickConnector and SecureRight
Securing With EasyClick

Video Guide: Evenflo Car Seat Installation – Rear-facing using LATCH
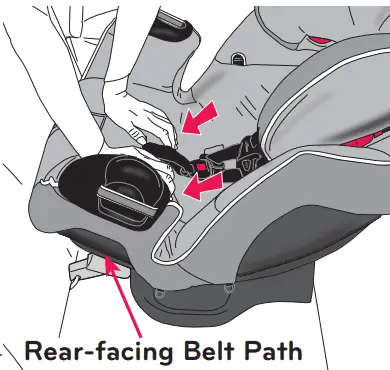
How to Install Evenflo Car Seat Using Vehicle Seat Belt in Rear-Facing
- Before installing the Evenflo car seat in rear-facing using the vehicle seat belt, you MUST move the lower anchor connector assembly to the forward-facing belt path.
- Adjust the recline position to #1.
- Place the car seat in the vehicle’s back seat in a rear-facing position.

Video Guide: Evenflo Car Seat Installation – Rear-facing using Seat Belt
Evenflo Car Seat Installation Forward Facing with Harness
Safe Use Checklist / Basic Instruction When Installing Forward-Facing
- Weight requirement: 22-65 lbs.; Height requirement: 28-50 in. and top of the child’s ears are at or below the top of the headrest; Age requirement: at least 2 years old.
- Do not install using the LATCH system for a child weighing more than 45 lbs.
- Do not use the LATCH system if you are installing with the vehicle seat belt.
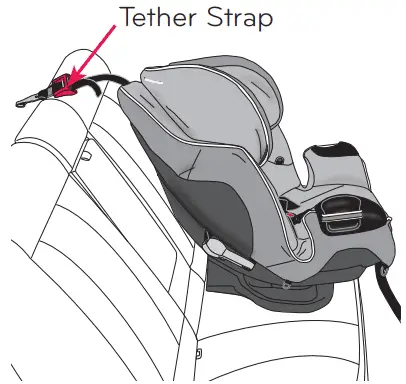
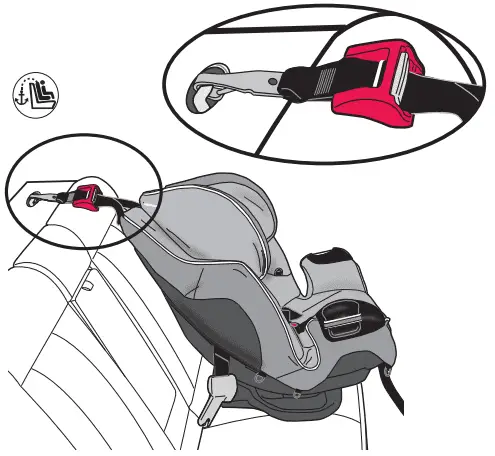
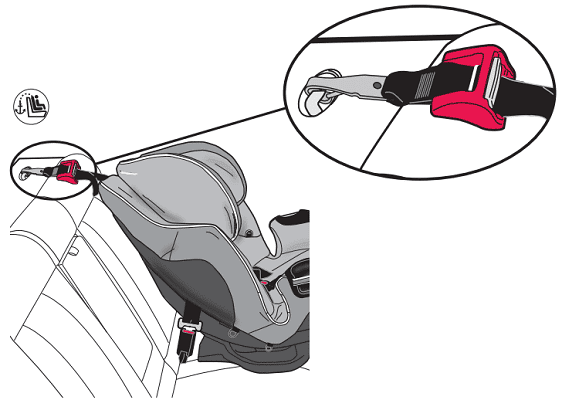
- Always use the top anchorage tether strap when installing in a forward-facing position using the LATCH/LUAS/ISOFIX system.
- The harness straps should be at or slightly above the child’s shoulders.
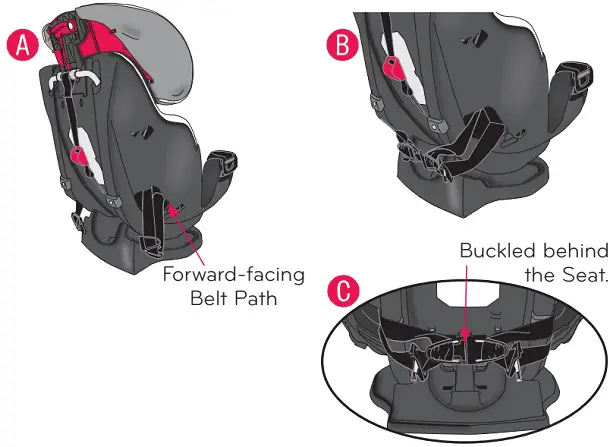
- The lower anchor connector assembly must be in the forward-facing belt path.
- Ensure the child restraint is installed in Recline Position #2 or #3.
- NEVER use Recline Position #1 for forward-facing and #2 for a child weighing more than 40 lbs. (use #3)
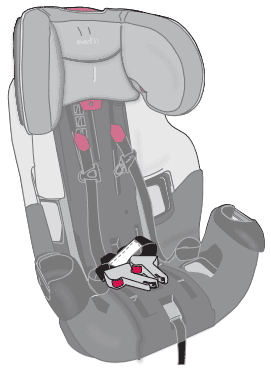
How to Install Evenflo Car Seat Forward Facing using LATCH
- Pull out the tether hook from the back of the car seat.
- Place the car seat in the vehicle’s back seat in a forward-facing position and lay the tether strap over the back of the vehicle seat.

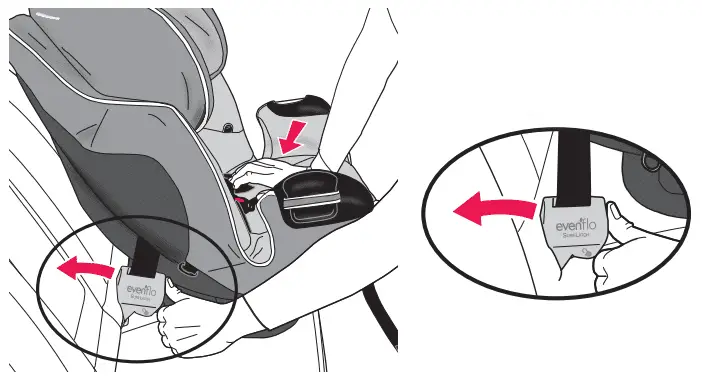
Securing With SureLatch
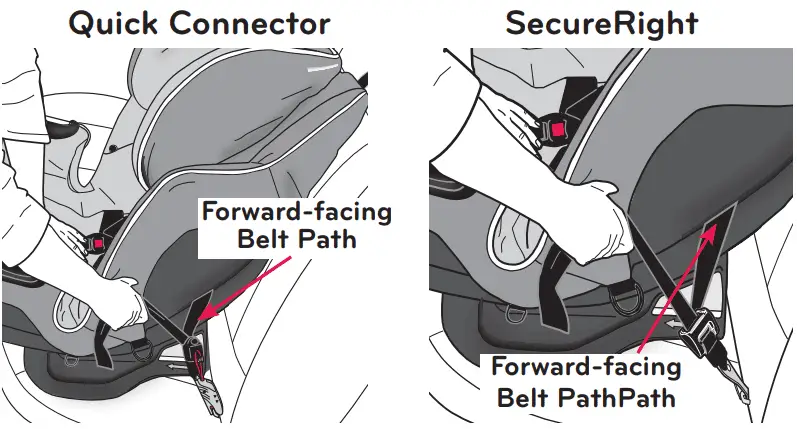
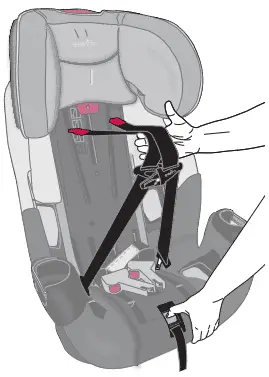
Securing With QuickConnector and SecureRight
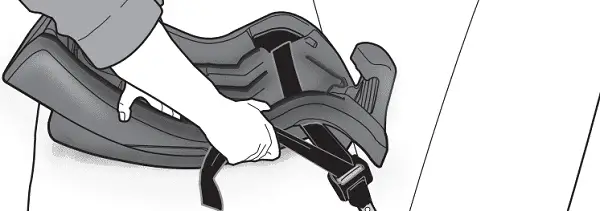
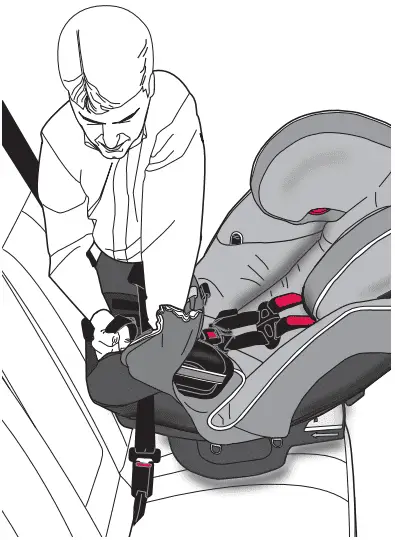
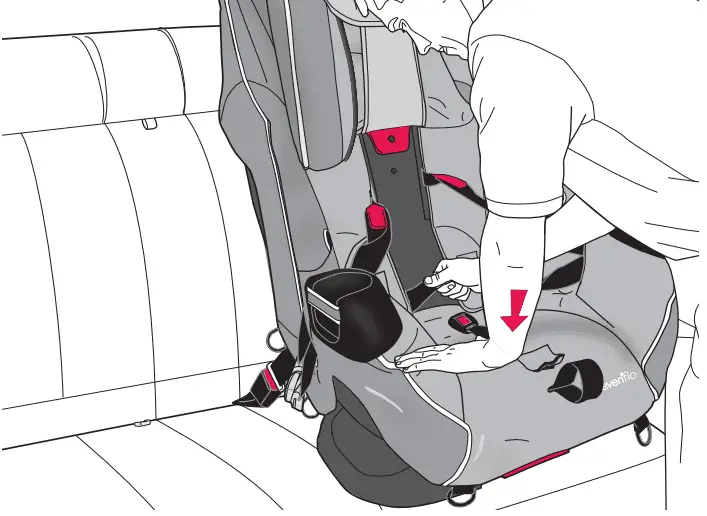
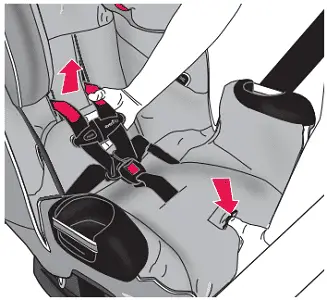
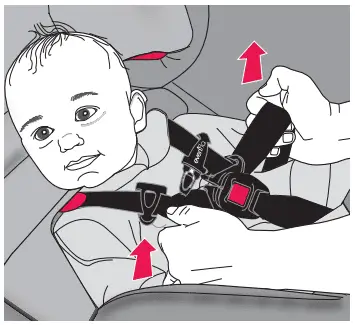
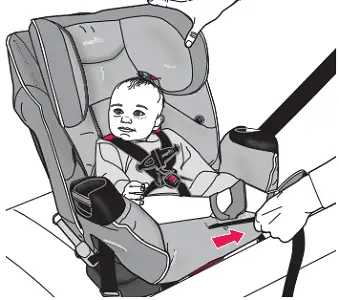
- When using either the QuickConnector or SecureRight feature, push the car seat firmly with your full weight into the vehicle seat while pulling the lower anchor strap till it is tightened, as shown;
Securing With EasyClick
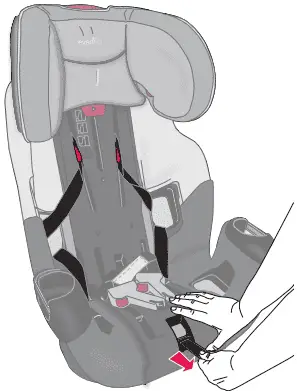
- Ensure you tighten the lower anchor strap by moving the EasyClick handle back and forth on the lower anchor strap as shown until the child restraint is tight;
Video Guide: Evenflo Car Seat Installation – Forward Facing using LATCH
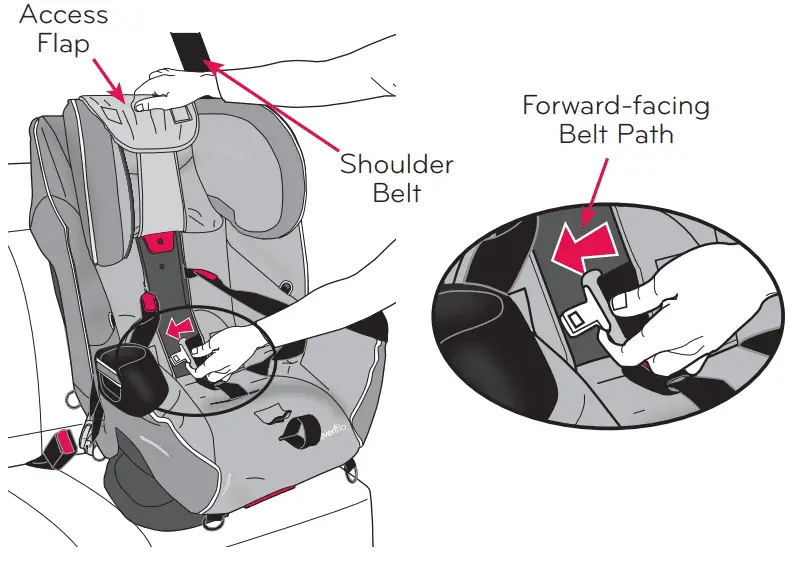
How to Install Evenflo Car Seat Forward Facing using Vehicle Seat Belt
- Pull out the tether hook from the back of the car seat.
- Place the car seat in the vehicle’s back seat in a forward-facing position and lay the tether strap over the back of the vehicle seat.

Video Guide: Evenflo Car Seat Installation – Forward Facing using Seat Belt
Evenflo Booster Seat Installation
Safe Use Checklist / Basic Instruction When Installing a Booster Seat
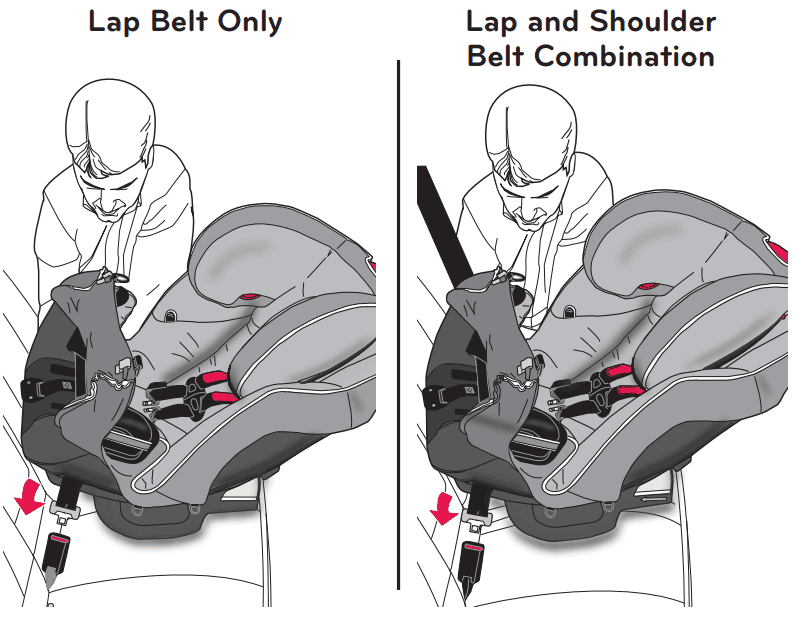
- Weight requirement: 40-120 lbs.; Height requirement: 40-57 in. and top of the child’s ears are at or below the top of the headrest; Age requirement: at least 4 years old.
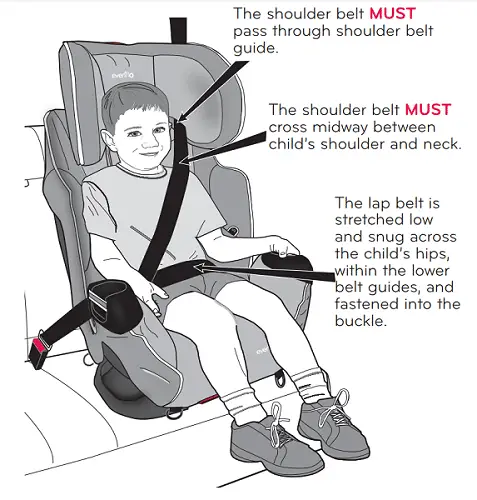
- The shoulder belt MUST pass through the should belt path.
- Do NOT install a booster seat with only the lap belt.
How To Convert to a Booster Seat – Installation
- Remove the seat pad.
- Adjust the child restraint headrest to the uppermost position.
- Pull the lower anchor straps from the forward-facing belt path and put them on the child restraint.

Video Guide: Evenflo Booster Seat Installation
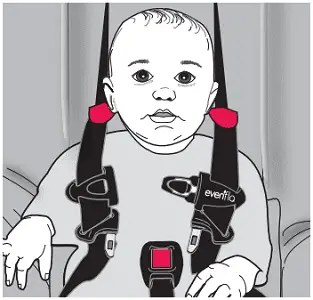
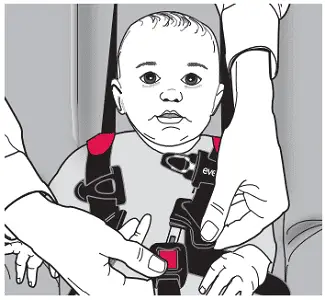
How to Secure A Child in the Car Seat after Installation
- Loosen the harness by pressing the harness release button on the front of the child seat.
Final Wrap Up
While this article aims to give you a guide on how to install Evenflo car seat, the Evenflo Symphony Car Seat manual and the Nurture™ Infant Car Seat Owner’s Manual were used to write this installation guide; however, the process is similar across all models.
You are encouraged to still check with the actual manual of your car seat model for installation.